Making an E-Book
If you’re one of the millions of tech-unsavvy people in the world, like myself, then the prospect of doing anything with heavy computer use can be somewhat daunting. A little over a year ago, I found myself facing one of the biggest challenges I’d dealt with in a while: converting Super Powereds: Year 1 into an e-book format. Not only did I have to do it, mind you, but I had to do it perfectly since this would be seen by (hopefully) countless people. With lots of research and a ton of trial and error, I managed to muddle through.
Now, a year and three books later, I’ve become familiar enough with the process to do my part in giving back. This isn’t some in depth guide though, those can be found all over the internet. They are equally as useful and comprehensive as they are often confusing. This is not one of them; this is what I needed back when I was starting out: a simple starter guide for dumb-dumbs like me.
So, let’s get started!
What You Need
First things first, you need to go download these two programs from their respective sites:
Both are free and neither has jacked up my computer yet, so they’re at least reasonably safe. Calibre is the first tool in your kit; it does the actual converting of a document into one of the popular e-book formats (mobi or epub). Sigil is going to be what you use to fine-tune the product once it’s converted. It’s an epub editor, and with it you can fix mistakes, tweak formatting, and deal with things like the Table of Contents.
Once you’ve got both downloaded, set-up Calibre and start it up.
Converting
This section would have required an extra three paragraphs if I’d written it last year, because Calibre couldn’t convert .doc or .docx files. Instead you had to do this Gerry-rigging bit where you made it into a quasi-html page and… it was just a pain in the ass. Luckily, with the new version word files can go right on in. Oh, and if you’re using Apple, then I have no idea what to tell you, I don’t even know if those programs work on Apple. There’s probably a more specific guide you can use. If you’re using Linux, then we both know damned well you don’t need the dumbed down version of a tech-guide. Come on bro, who do you think you’re fooling?

Anyway, all you have to do is click the giant Add Book button, select your file, and then hit the equally giant Convert Book file to open the conversion menu. There’s a lot of shit here, no doubt about it, and we’re going to deal with almost none of it. Yes, here you can tweak and build and customize to your heart’s content, but this guide is just about getting it done. What you do need to do is add in a cover image, if you have one, and set the output format to epub. Yes, even if you’re making a book for kindle this is still the first step. You’ll see why soon.
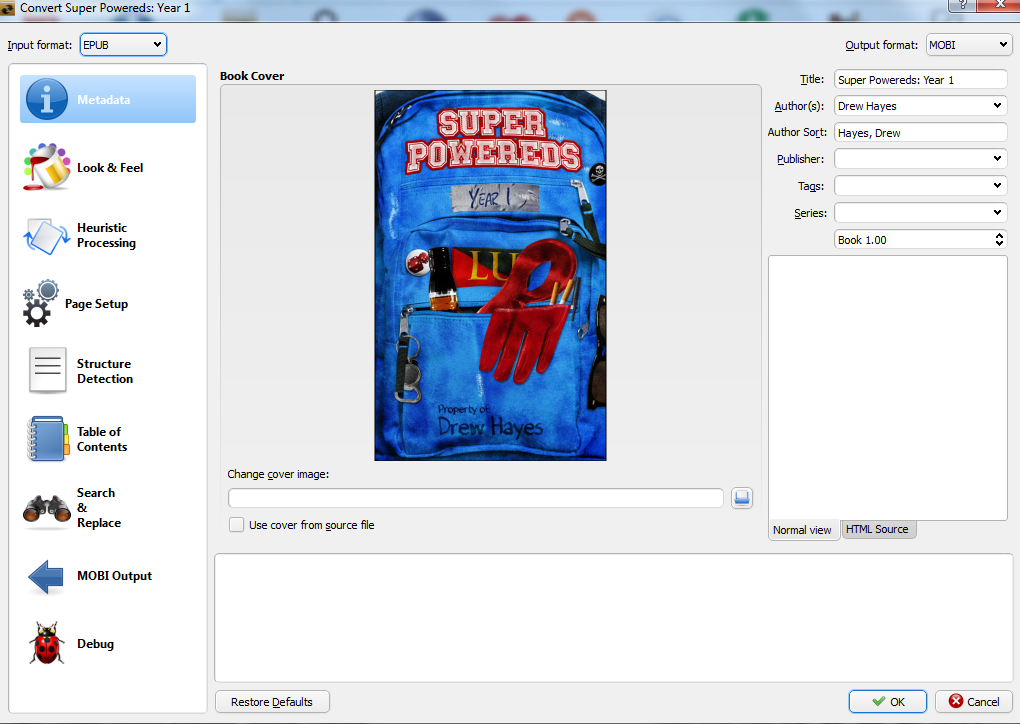
When that’s done, you’ll click on page setup and make sure the output format matches the intended device of your choice. This will just make sure everything formats smoothly from the beginning, keeping you from tweaking crap at the last minute. Since I sell through Amazon, I always select the Kindle Fire as my output. It’s a stable one that’s never given me any grief, so if you want a starter on that’s a good way to go.

Now just hit “Okay” and you’re set. This will get your book to an epub format, which is what you need to see how it will look.
Detail Work
Here is where Sigil comes in. Open it, then locate your new epub file’s folder and load it up. From here, you can see everything about your file as it will function in an epub reader. The first thing you want to do is check the splits (They're the section on the left).

These represent where your book’s chapters will come to an end in the reader, so you don’t have the next chapter starting halfway down the pages. Essentially, they are page breaks, which is a handy comparison because if you used page breaks in your Word file then these will already be separated. You should still check them, because it never hurts to be careful. If you find one missing, or forgot to add them in the first place, don’t fret. Adding breaks is super easy. Just go Into Insert and click Add Split Marker. When you’ve got them all in place, go to Edit and select Split At Markers. Poof! Instant breaks.
Next up, making a Table of Contents. You can see in the above photo that all the TOC links are on the right. Go through and click each one to make sure its loading to the proper point. If not, you’ll need to tweak it. If you don’t have a TOC, creation is a snap. Just select Tools to start. If you’ve done your splits and have no table, hit Generate Table of Contents to get one created. If you already have one, hit Edit Table of Contents to make sure everything is good.
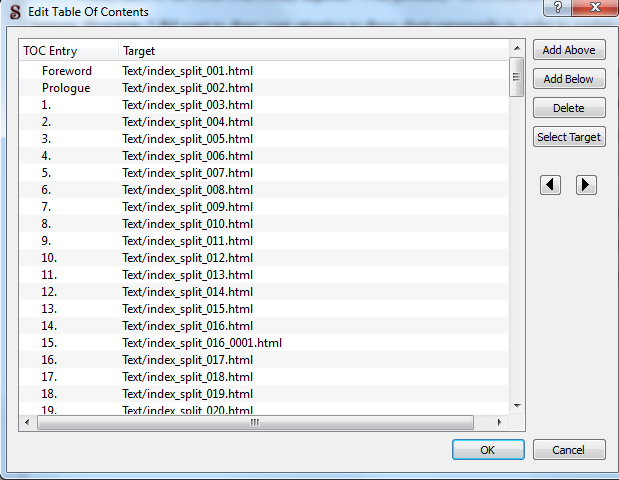
Here you can see every TOC point, how it is labeled, and where it links to. You can make them full sentences, have them say “Chapter X” or do as I have and keep it simple. If any of them are linking to the wrong spots, just change the link to the appropriate split number. Hopefully you guys are smart enough not to write 150+ chapter books like me, so this should be a quick and painless process.
Alright, once all that is done you now have an ebook with basic formatting and features. If you’re sending it to Nook, then you’re done because they take the epub format. If, however, you’re going Kindle then there’s one step left.
Re-Converting
You’re going to do exactly what you did the first time with Calibre, except this time you’re loading in the epub file instead of the docx you used before. Get it in, hit Convert, and go into the menu. This time the only thing you should need to touch is the output option. You’ll want to select MOBI, as that’s the Kindle’s accepted format. Hit “Okay” and you’re finally done.
Congratulations! You’ve turned a writing file into a respectably crafted e-book, and without having to spend the hours searching for appropriate programs like I did. From here there’s a tremendous amount you can learn, certainly all sorts of neat additions to tack in. Just remember your basics, and don’t forget to do the double checks. It’ll make things way easier on you in the long-run.